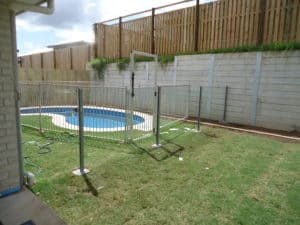
Installing Glass Pool Fencing
Glass pool fences are growing in popularity and in demand now that more and more people have come to appreciate its convenience plus add to that the aesthetics they bring to any home. Regardless of the type of architectural design you have in your home, glass pool fences will fit right in.
Sure, back in the days you would see different kinds of pool fences but all it ever did was to fulfill safety regulations and have nothing to do with improving the overall attractiveness of your backyard. At present, homeowners can now have the option to want a safety fence around their pool without compromising the overall look of their backyard. Majority of homeowners opt for glass pool fences because of its sleek, tough and unobtrusive design. You can also enjoy barbecues and beers with your friends and family on one side of your yard without worrying what your kids are up to on the other side while they are in the pool because from where you are standing, you can see right across through the glass panels. So you see, it’s like hitting two birds with one stone. It is convenient, sturdy and more importantly, it helps add flare to any home.

You are probably wondering how to install glass pool fences around your pool area. Well, we will provide you with a DIY guide on how to do just that. However, we strongly recommend that you hire professionals to do the job for you like ALS Glass Works. Nothing beats the handiwork of professionals who have been doing this job for years. But if you do decide to give it a try on your own, you can do so at your own risk. Here’s how to do it.
Firstly, plan your layout. You have to first know the components requires in building a pool fence ensuring that it meets all council requirements. For the materials, you need to contact a supplier and inform them about the dimensions of your pool area so they can recommend the quantity of glass panels, concrete footings and gate panels you’ll need. The estimated cost will depend on the quantity of materials ordered.
However, before you start with your project you have to make sure that you are completely prepared. This is a tough job that requires dexterity and meticulousness. The last thing you’d want to end up with are broken glass shards because you weren’t careful enough. So again, get in touch with the council and ask about building regulations that you need to comply with. Next is to check the site for attachment points like footing or concrete slab. Then choose the type of fencing that will suite your site and lastly order all the components you need so you can start.
Preparing the site is also very important because the posts need to be secured to either a 400x400x400 mm footings or 100mm thick slab.
Step 1: You have to lift the pavers. Get 2 flat drive screwdrivers and place them into the paving joints. You have to apply force to the handles so you can lift the paver from where it is located. After removing it, you must create an opening. Lift as many pavers as possible until you can uncover the footing site.
Step 2: Dig up trenches. Get ready for some digging. You need to dig around 400×400 mm trenches with centerlines that correspond to the centerlines on your fence.
Step 3: Pour concrete footing. Your next step is to pour the concrete by amalgamating five parts sand, ten parts aggregate and two parts cement mixed with water. Fill the dug up trenches. Leave it to dry. Replace the pavers on a wet mortar mix.
For installing the fencing you need to do the following:
Step 1: Lay out hole positions. Screw the baste plates to your mini posts. You have to remove the cover plates and use each mini post to know the positions of the holes. The position of the posts has to be 200mm from the glass’ edge. Line them up first before you start drilling.
Step 2: Start drilling! You’ll need a hammer drill to do this job. It has to be 5mm and then a 10mm masonry bit so you can drill through the paving. It has to have a minimum depth of around 80mm.
Step 3: Make sure you anchor the posts. Check your hole alignment as well as the position of your mini posts. You will need a caulking gun so you can apply a chemical anchor into your holes then put in M8 Chemset anchor studs. Make sure you leave 10mm to protrude right above your base plate.
Step 4: Blot your posts. Leave the chemical anchor to cure for sixty minutes. Tighten the studs using a shifter to ensure the mini post is stable and secure then slip on a base cap for every mini post.
Step 5: Make sure your end brackets are secure. Secure your end brackets with sturdy screws.
Step 6: Position your glass panels. Carefully lift the glass panels into the mini posts and let the glass slide easily into its position.
Step 7: Secure the panels firmly.
Step 8: Level your panels by using a spirit level. You can make necessary adjustments by loosening the nuts that secure your mini post. Just make sure to tighten them once your done and replace the base caps.
Step 9: Lastly, make sure you hinge your gate panel. Attach the hinges and then slowly release the tension. Attach the latch on the poolside.
And there you have it that is how you install glass pool fencing on your own. You don’t necessarily have to go through with this tedious work because ALS Glass Works can do this for you. Simply request a quote and we’ll get back to you ASAP.
